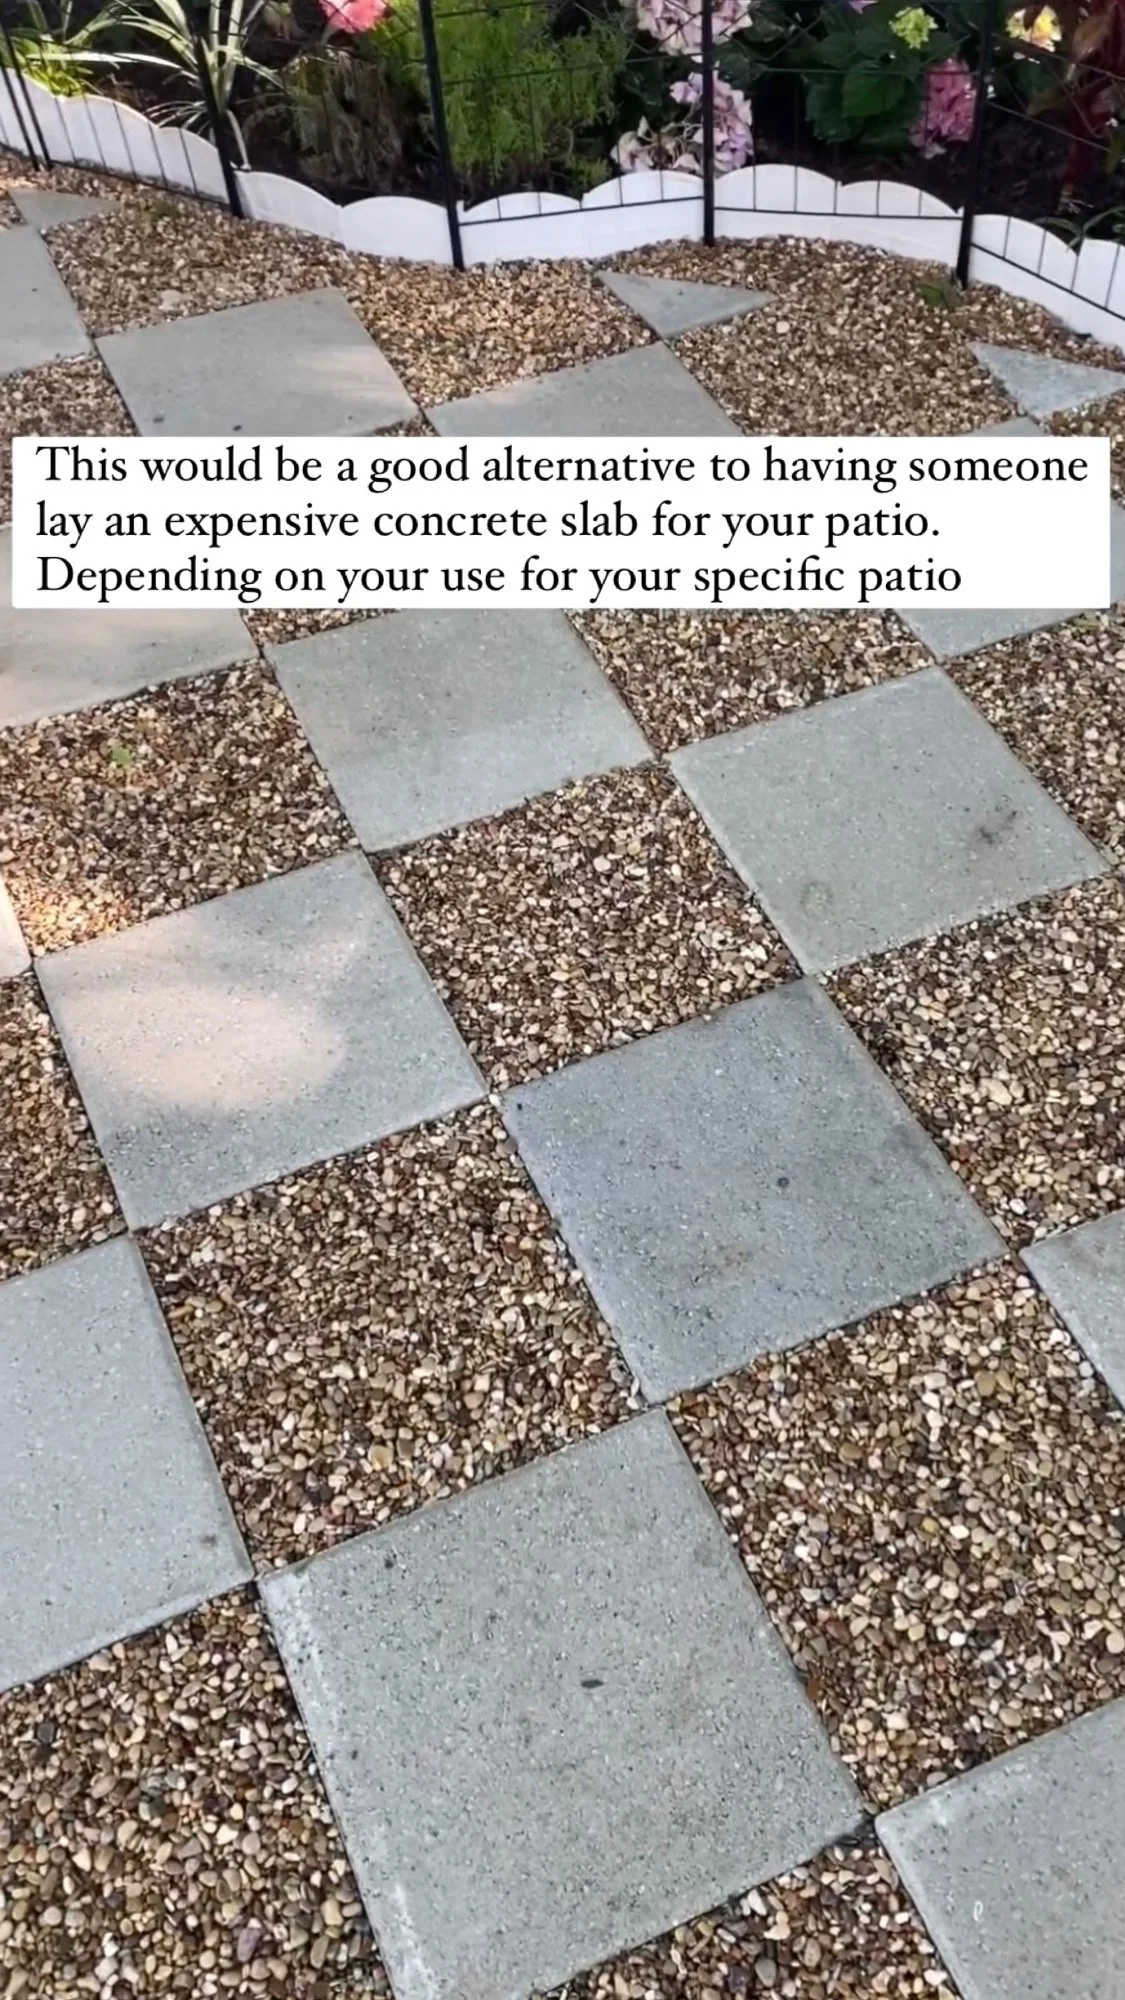
Diamond Paver Patio | DIY
I am going to break down the steps for creating your own diamond paver patio. Materials and all of the steps that it took to create this affordable patio alternative listed out below!
Inspiration Photo for our Diamond Paver Patio
The Step by Step Breakdown:
Cleaning Up the Site - The first step includes cleaning up any debri / grass / weeds from your disired area. I recommend marking out your area with markers / spray paint or string so you know exactly what your square footage is and where your focus is.
Gather All of your Materials - If you have prepped all of your materials you are ready to go, as well as either rent or purchase a tamper tool. All materials needed are listed below.
Lay Down the Base - For the base material we used decomposed granite from our local stone yard. Use your rake to evenly lay the material and use your tamper tool to flatten the area.
Edge Out the Area - You’ll want to nail down your edging to separate your pea gravel & pavers from your grass. Debatable on if you should do this before or after laying down your base. We did it after.
Roll the Landscape Paper - Use a larger 5 foot wide landscape paper to roll out and cover more surface area.
Lay out your Diamond Pattern - Now for the fun part, you get start to see the vision of your patio coming to life. Just try to lay them point to point and as straight as possible.
Cuts - If you have a tile saw you are able to cut down your pavers at weird edges easily. If you don’t have one, lay your pattern with making no paver cuts in mind.
Sweep the Gravel - If you have a wide set broom we found this be very useful for laying and evening out the gravel in between the diamond pavers.
Spray your Mulch Glue - After everything is in place and your peagravel is even with the pavers, spray mulch glue down which is also great for keeping gravel in place. Just make sure the gravel is dry and it is expected not to rain.
For the foundation material we used Crushed Granite, but some people use sand or other crushed stone materials for their base. The Tamper tool we decided to purchase vs. renting so we would have it for future projects.
Once our crushed granite was pressed down, we laid our landscape paper, edging and pavers in the diamond pattern.
Lastly, we found that adding the glue made a huge difference in not only keeping the pea gravel in place, but the overall look. It was also much easier to walk on and your not sliding around on the gravel after it dries. We are truly loving how it transformed our muddy under our tree area to a cute garden paver accent to our backyard!
The Mulch Glue hardened all of the pea gravel to keep the paver pattern looking beautiful and it made it easier to walk on with all of the gravel staying in place.
Material List
Tools - Home Depot - Wheel Barrel, Tamper, Rake and or Wide Broom - Buy or Rent Tamper - Ames 48 in. Handle 8 in. x 8 in. Steel Tamper 2233400 - The Home Depot
Crushed Decomposed - Stone Yard or Home Depot - Pavestone 0.5 cu. ft. Decomposed Granite 54160 - The Home Depot
Pea Gravel - Stone Yard or Home Depot - Vigoro 0.5 cu. ft. Bagged Pea Gravel Pebble Landscape Rock 54255 - The Home Depot
12 inch Pavers - Home Depot - Pavestone 12 in. x 12 in. x 1.5 in. Pewter Square Concrete Step Stone 71200 - The Home Depot
No Dig Edging - Home Depot - ProFlex No-Dig 60 ft. Landscape Edging Kit 3001HD-60C - The Home Depot
5’ Wide Landscape paper - Home Depot - Agfabric 5 ft. x 100 ft. Black Heavy-Duty Landscape Fabric Pro Commercial Weed Barrier W1GC3205100BK - The Home Depot
Mulch / Gravel Glue - Amazon - https://amzn.to/3R9Z9xe
1 Gallon Sprayer - Home Depot - HDX 1 Gallon Multi-Purpose Lawn and Garden Pump Sprayer 1501HDXA - The Home Depot
I hope you are able to take this information and use it on your own project, we were able to knock this out in a day. If you have all of the right materials and tools prepped it is a relatively easy and provides a big impact with this transformative diamond patio.
Have fun guys & I hope this helps!


